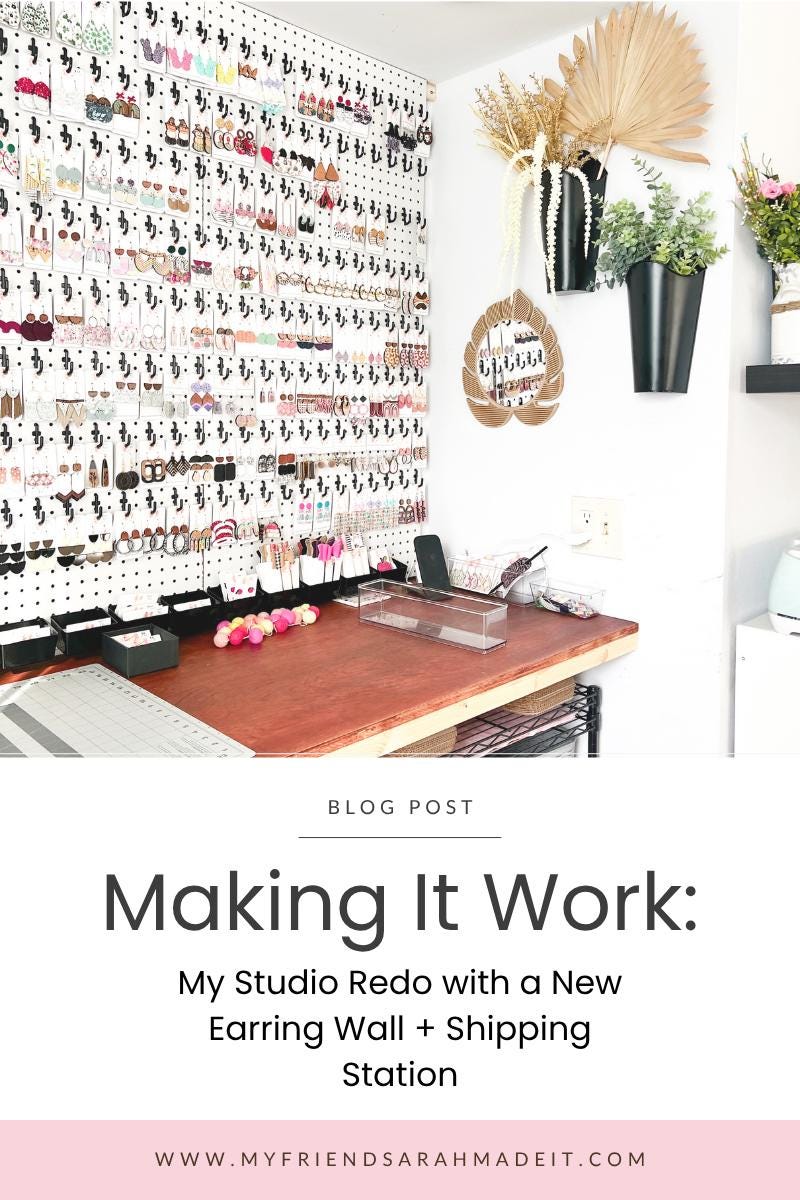
You know how sometimes a tiny change snowballs into something way better than you expected? That’s exactly what happened with my recent studio refresh. I wasn’t planning a big overhaul, but one little tweak turned into an earring wall, a shipping counter, and a space that honestly makes me smile every time I walk in. Let me show you around - and give you a peek behind the curtain of what it really looks like to run this handmade shop from my home.
Before: The Corner That Wasn’t Working
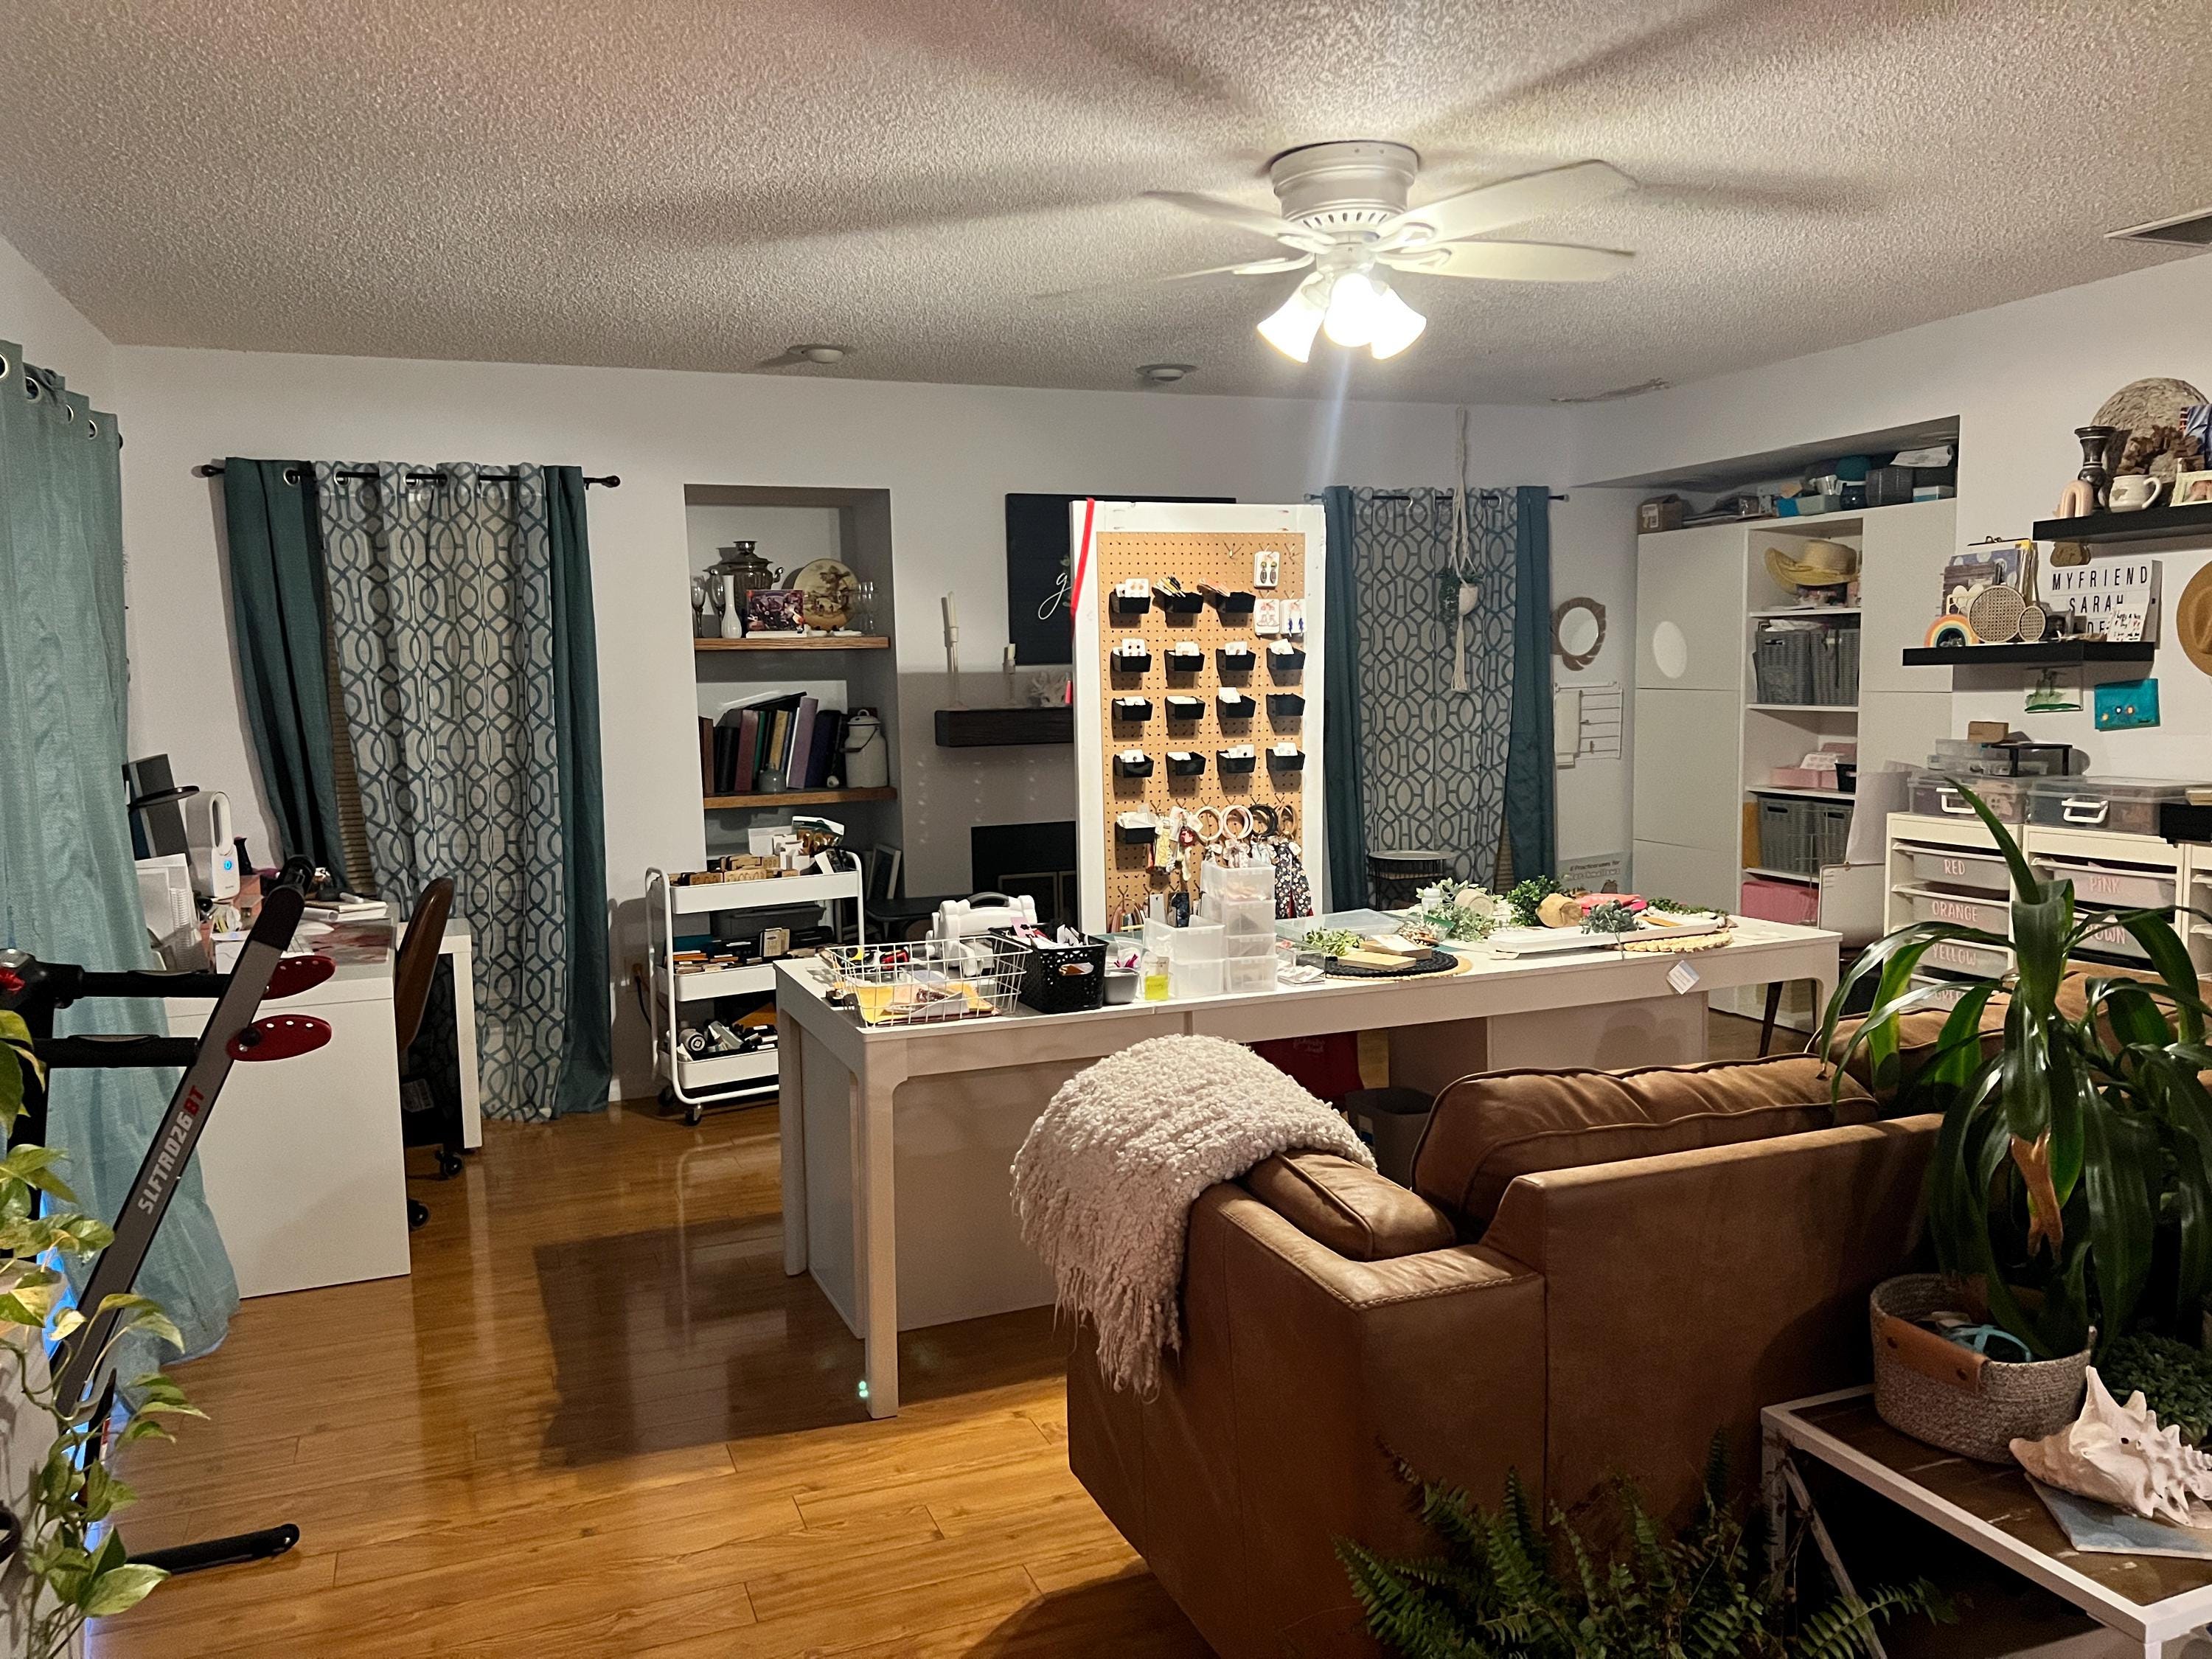
Here’s the “before” shot - and yes, our windows were boarded up for Hurricane Milton when I snapped it, so the lighting isn’t doing me any favors. But this angle shows how I originally had everything set up: one desk held my computer and printer, another held my work supplies, and my storage cabinets were perfectly tucked in the niche on the far right. It worked... until it didn’t. The big pain point? My earring display. I had everything stacked on what had initally been my very first vendor display board, with 4 or 5 pairs hanging from a single peg. It looked fine, but it was a real hassle to find the exact pair when packing orders. And don’t even get me started on how many times we ALL tripped over the legs sticking out.

The Studio Glow-Up: What We Changed
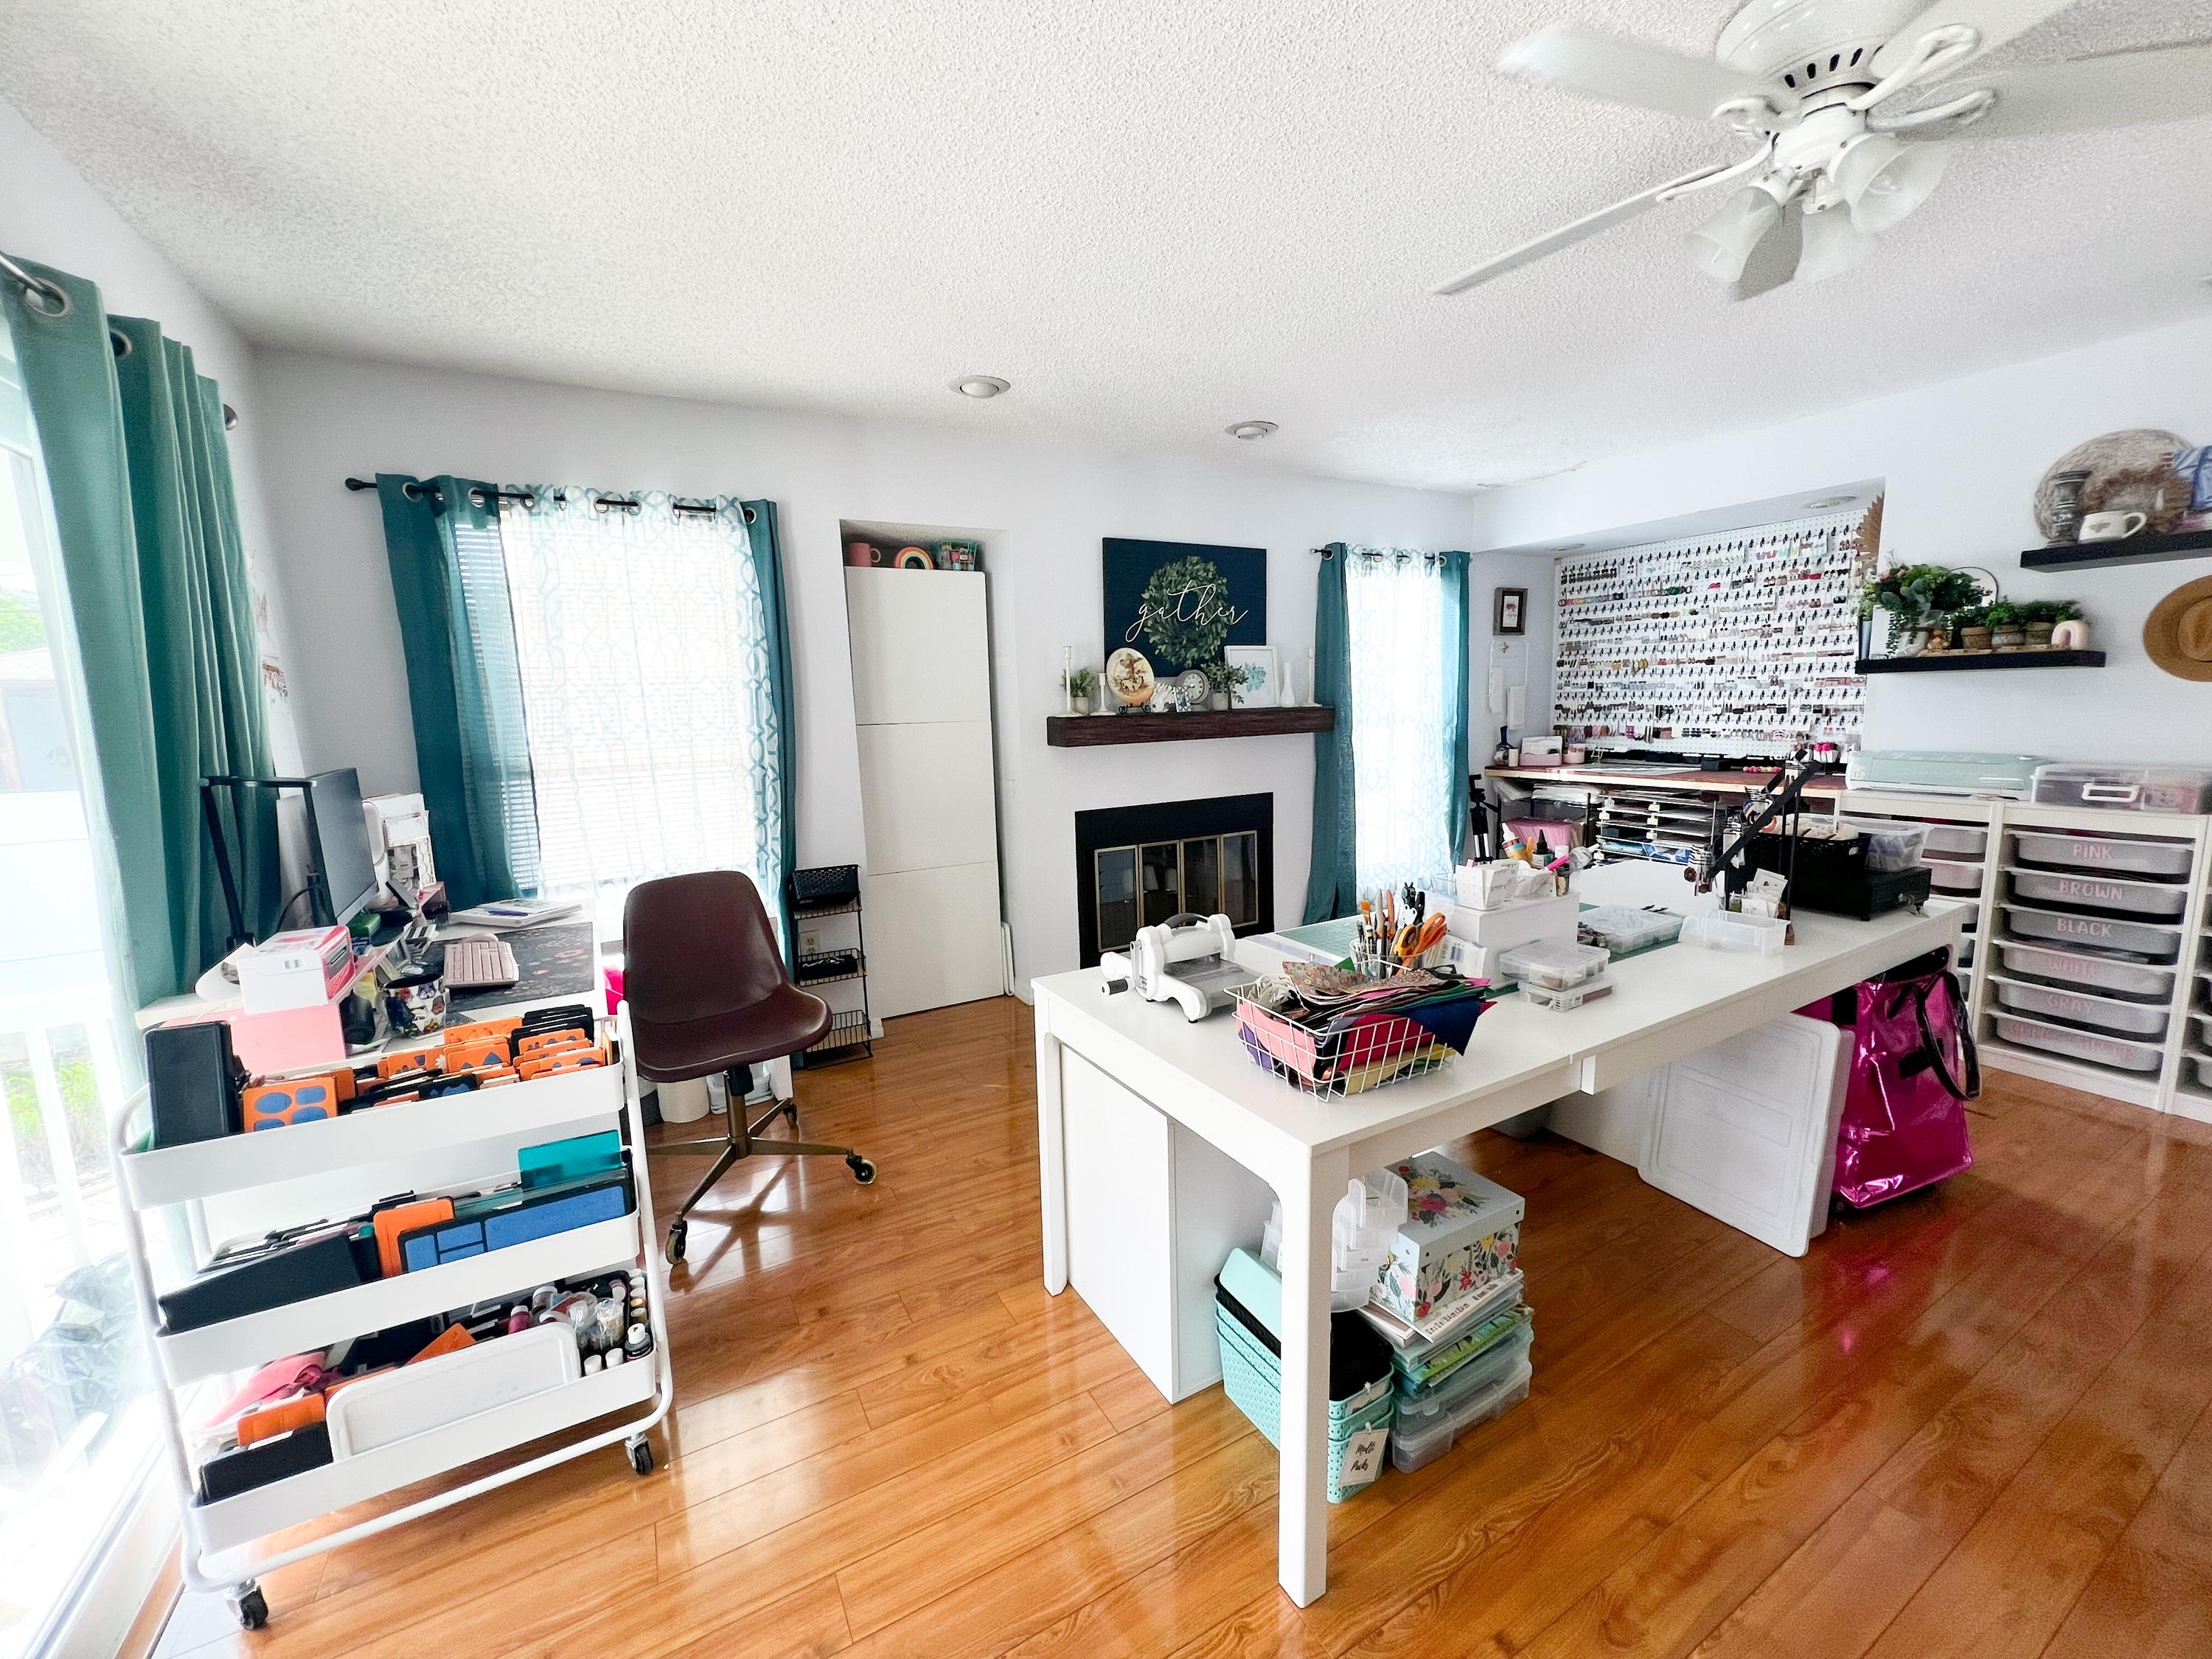
I'm not gonna lie, I'd been dreaming of an earring wall for a long time - but because my studio is a previous den, right in the open of our downstairs, I didn't have a lot of open walls to work with. I couldn't stop thinking about it, though so I just kept mentally playing with options. Once I figured out what I could do in the space, I enlisted my trusty contractor (my husband) to help me take it to the next level. Here's what we did:
- Removed the built-in glass shelves next to the fireplace (and gave those away on Facebook Marketplace)
- Moved one of my cabinets into that space to create a built-in feel (eventually I'd like this to be a proper built in, that when if/when I ever move my workshop to another area, this workshop can function as a games cabinet or additional storage closet)
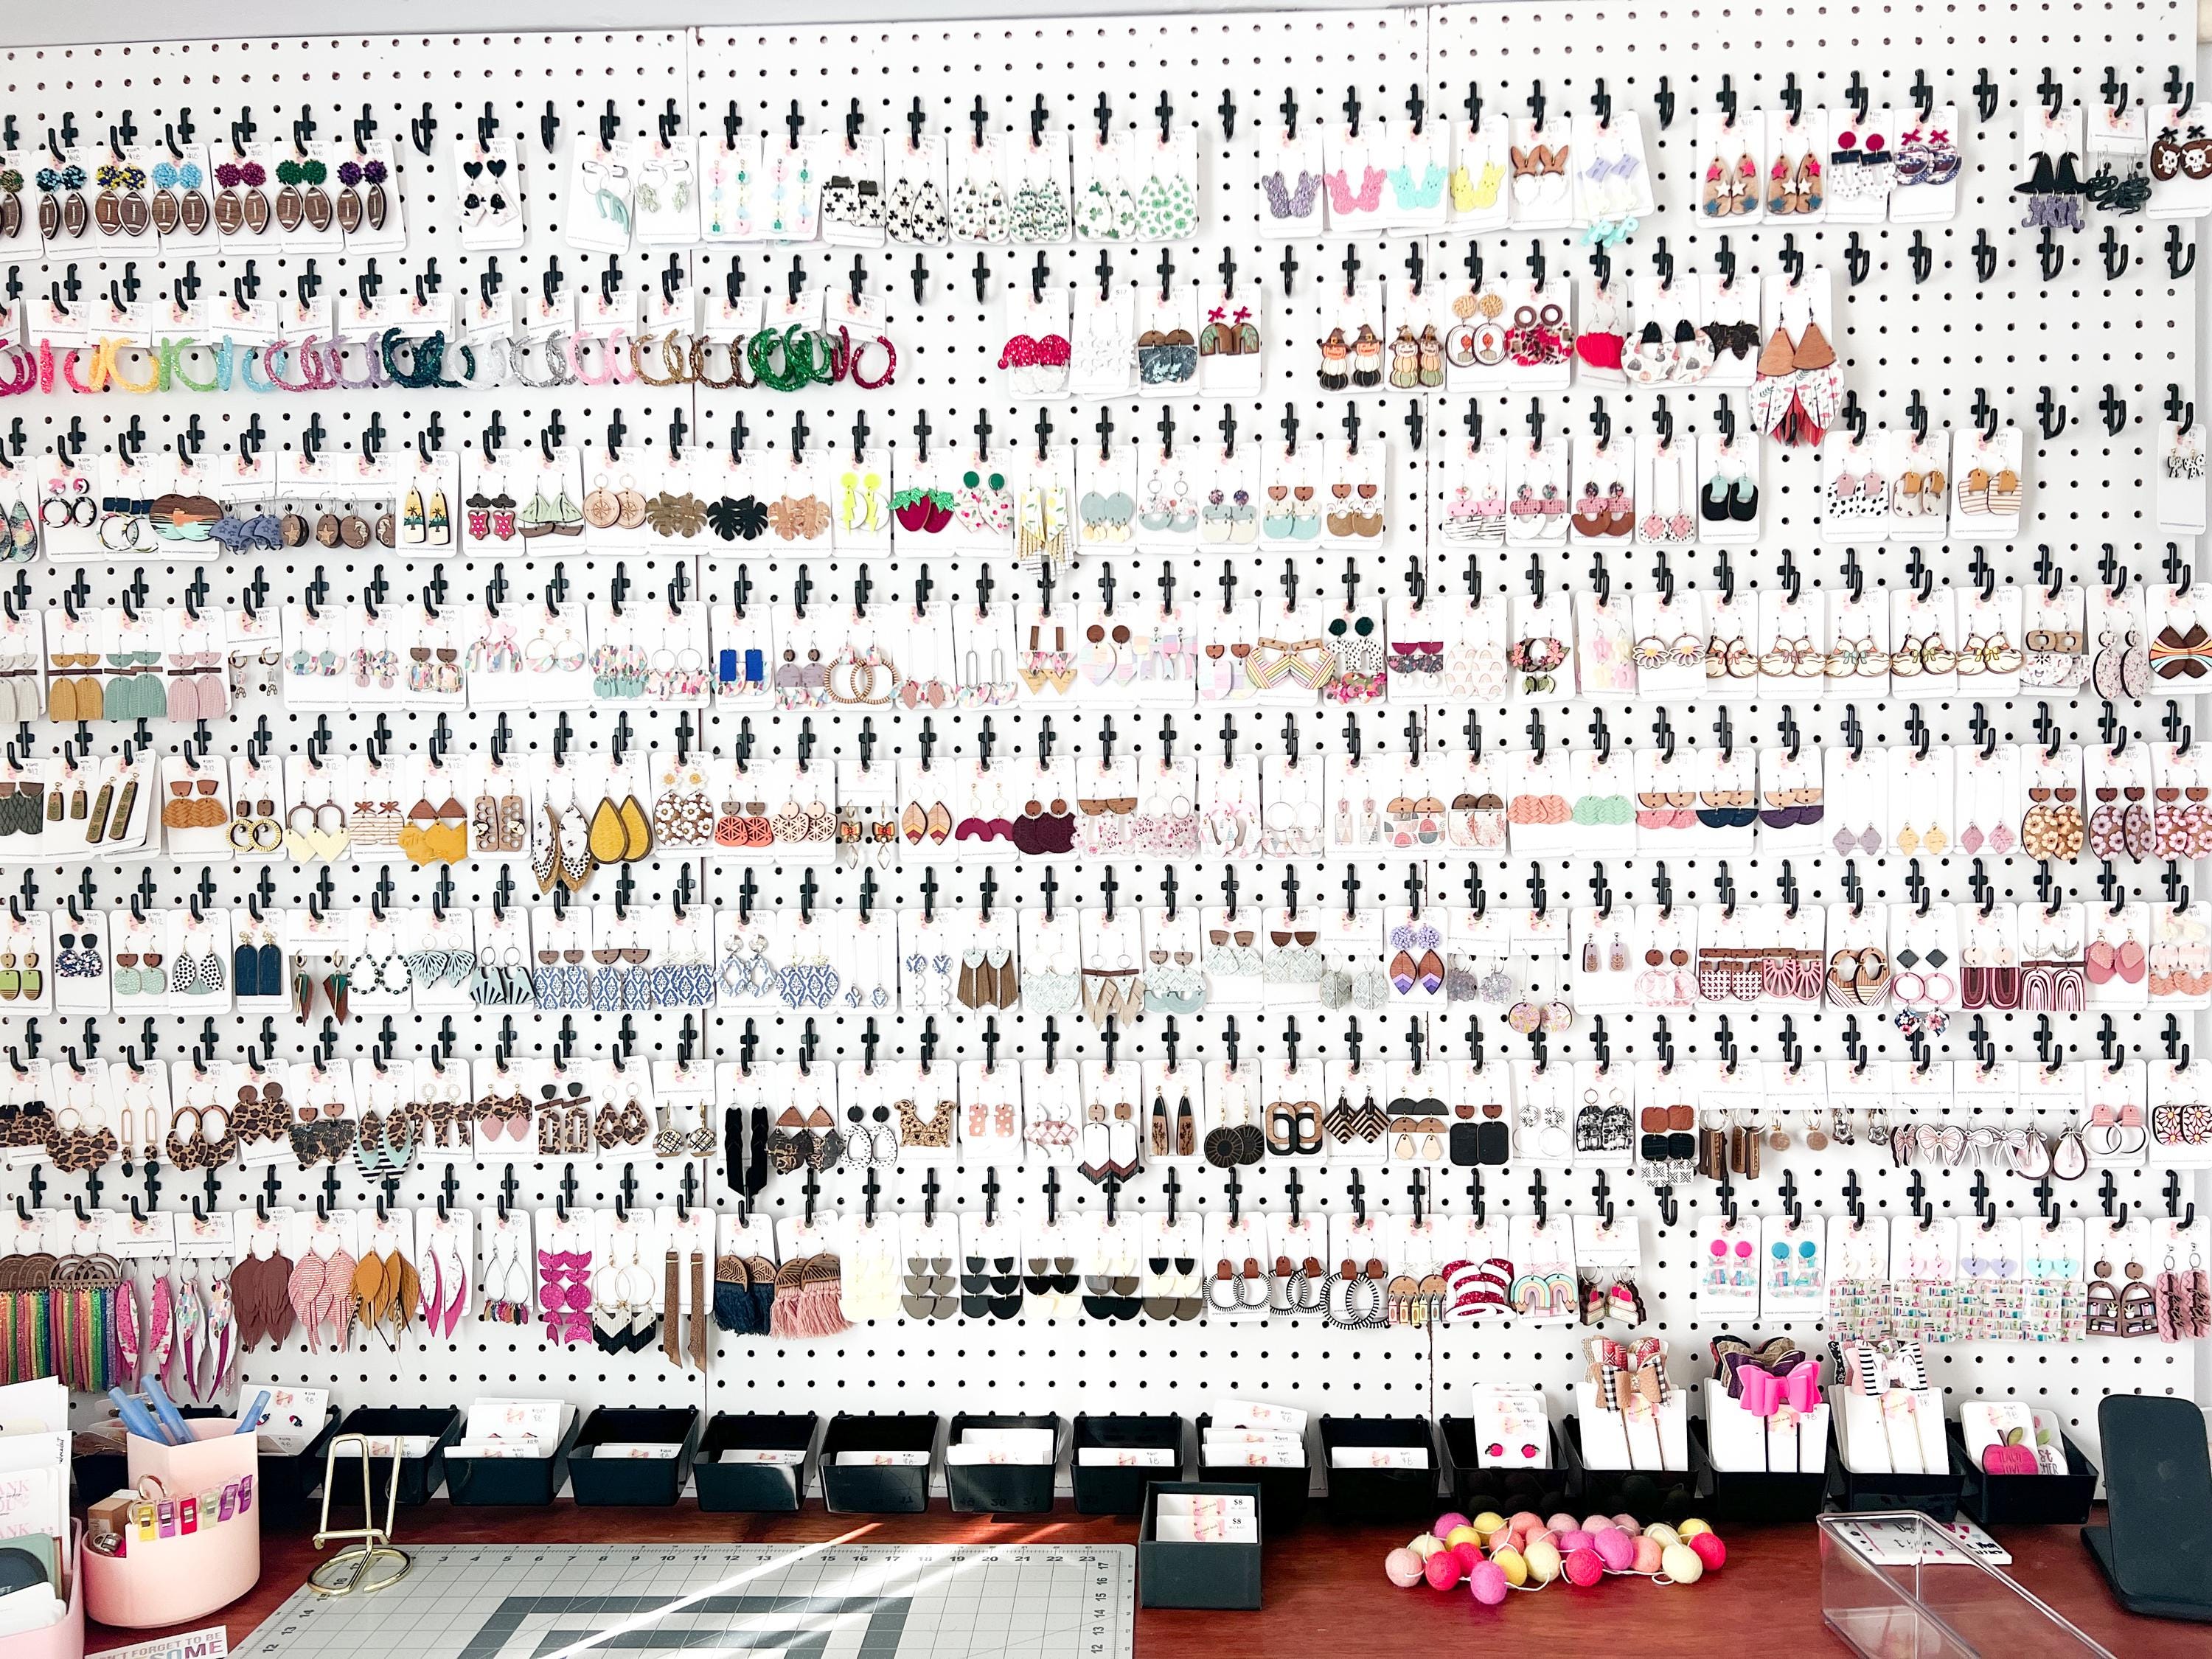
- Buildt a frame for my new earring wall, complete with mounted pegboards - I upgraded from one singular pegboard to THREE!
- Added a counter-height “desk” underneath - which now acts as my shipping station!
The underside is open (for now) and holds all the bins and boxes I need for packaging, plus storage for my wood and acrylic supplies. It's still not completely finished, I do need to stain the counter support, add a frame around the earring wall, and I might add a curtain to conceal the undercounter storage. But right now? It's working great for me and I can't stop staring.
Why the Earring Wall Changed Everything
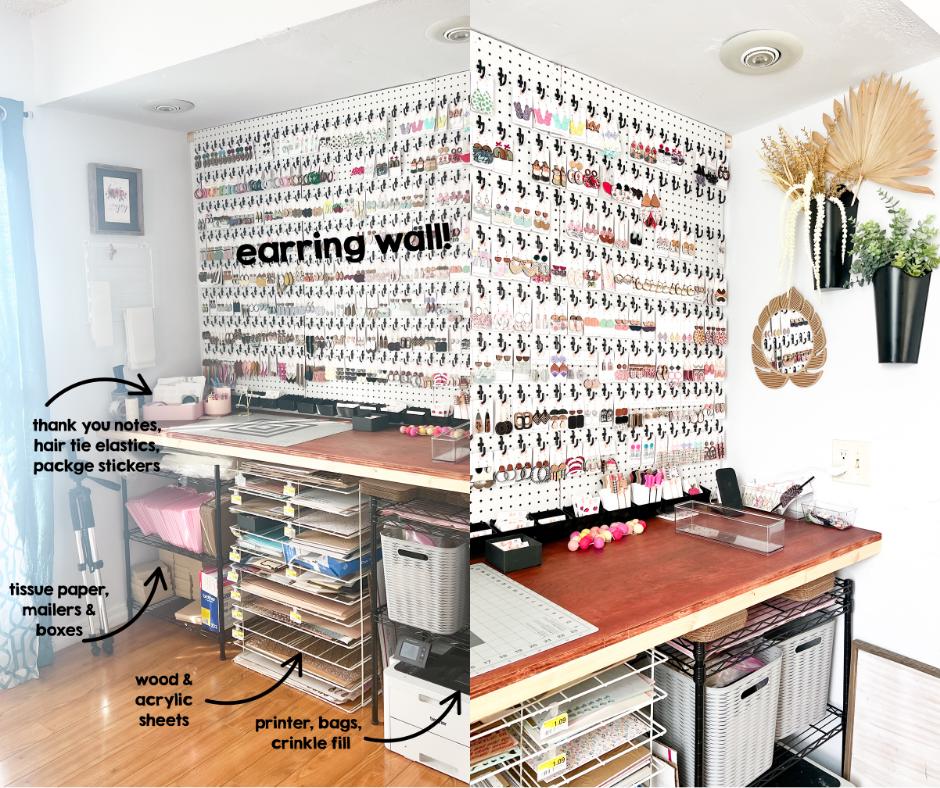
My old setup felt like a game of Tetris. Now? Each pair of earrings has its own hook. No more digging, no more guessing, and no more stacking. I can see everything at a glance - which makes it easier to stay organized and get orders out faster. Plus, let’s be honest: it’s just really pretty. (This is your official invitation to zoom in on that wall photo and pick your favorite pair.)
Final Thoughts
One thing I’ve learned while running My Friend Sarah Made It is that your space should work with you, not against you. I live and work in the same house, and things are constantly evolving - but that’s part of the fun. So if something in your space isn’t working? Don’t be afraid to change it. A little shift can lead to something surprisingly perfect.
PS: Got a creative space that’s always in progress too? Tag me on IG or shoot me a DM - I’d love to see how you’re making it work.
xoxo,
Sarah